

Create Your Baryon Sweeper Battery
Learn how to assemble a custom battery for PSP.
Tutorial created by Edgar F. Diéguez
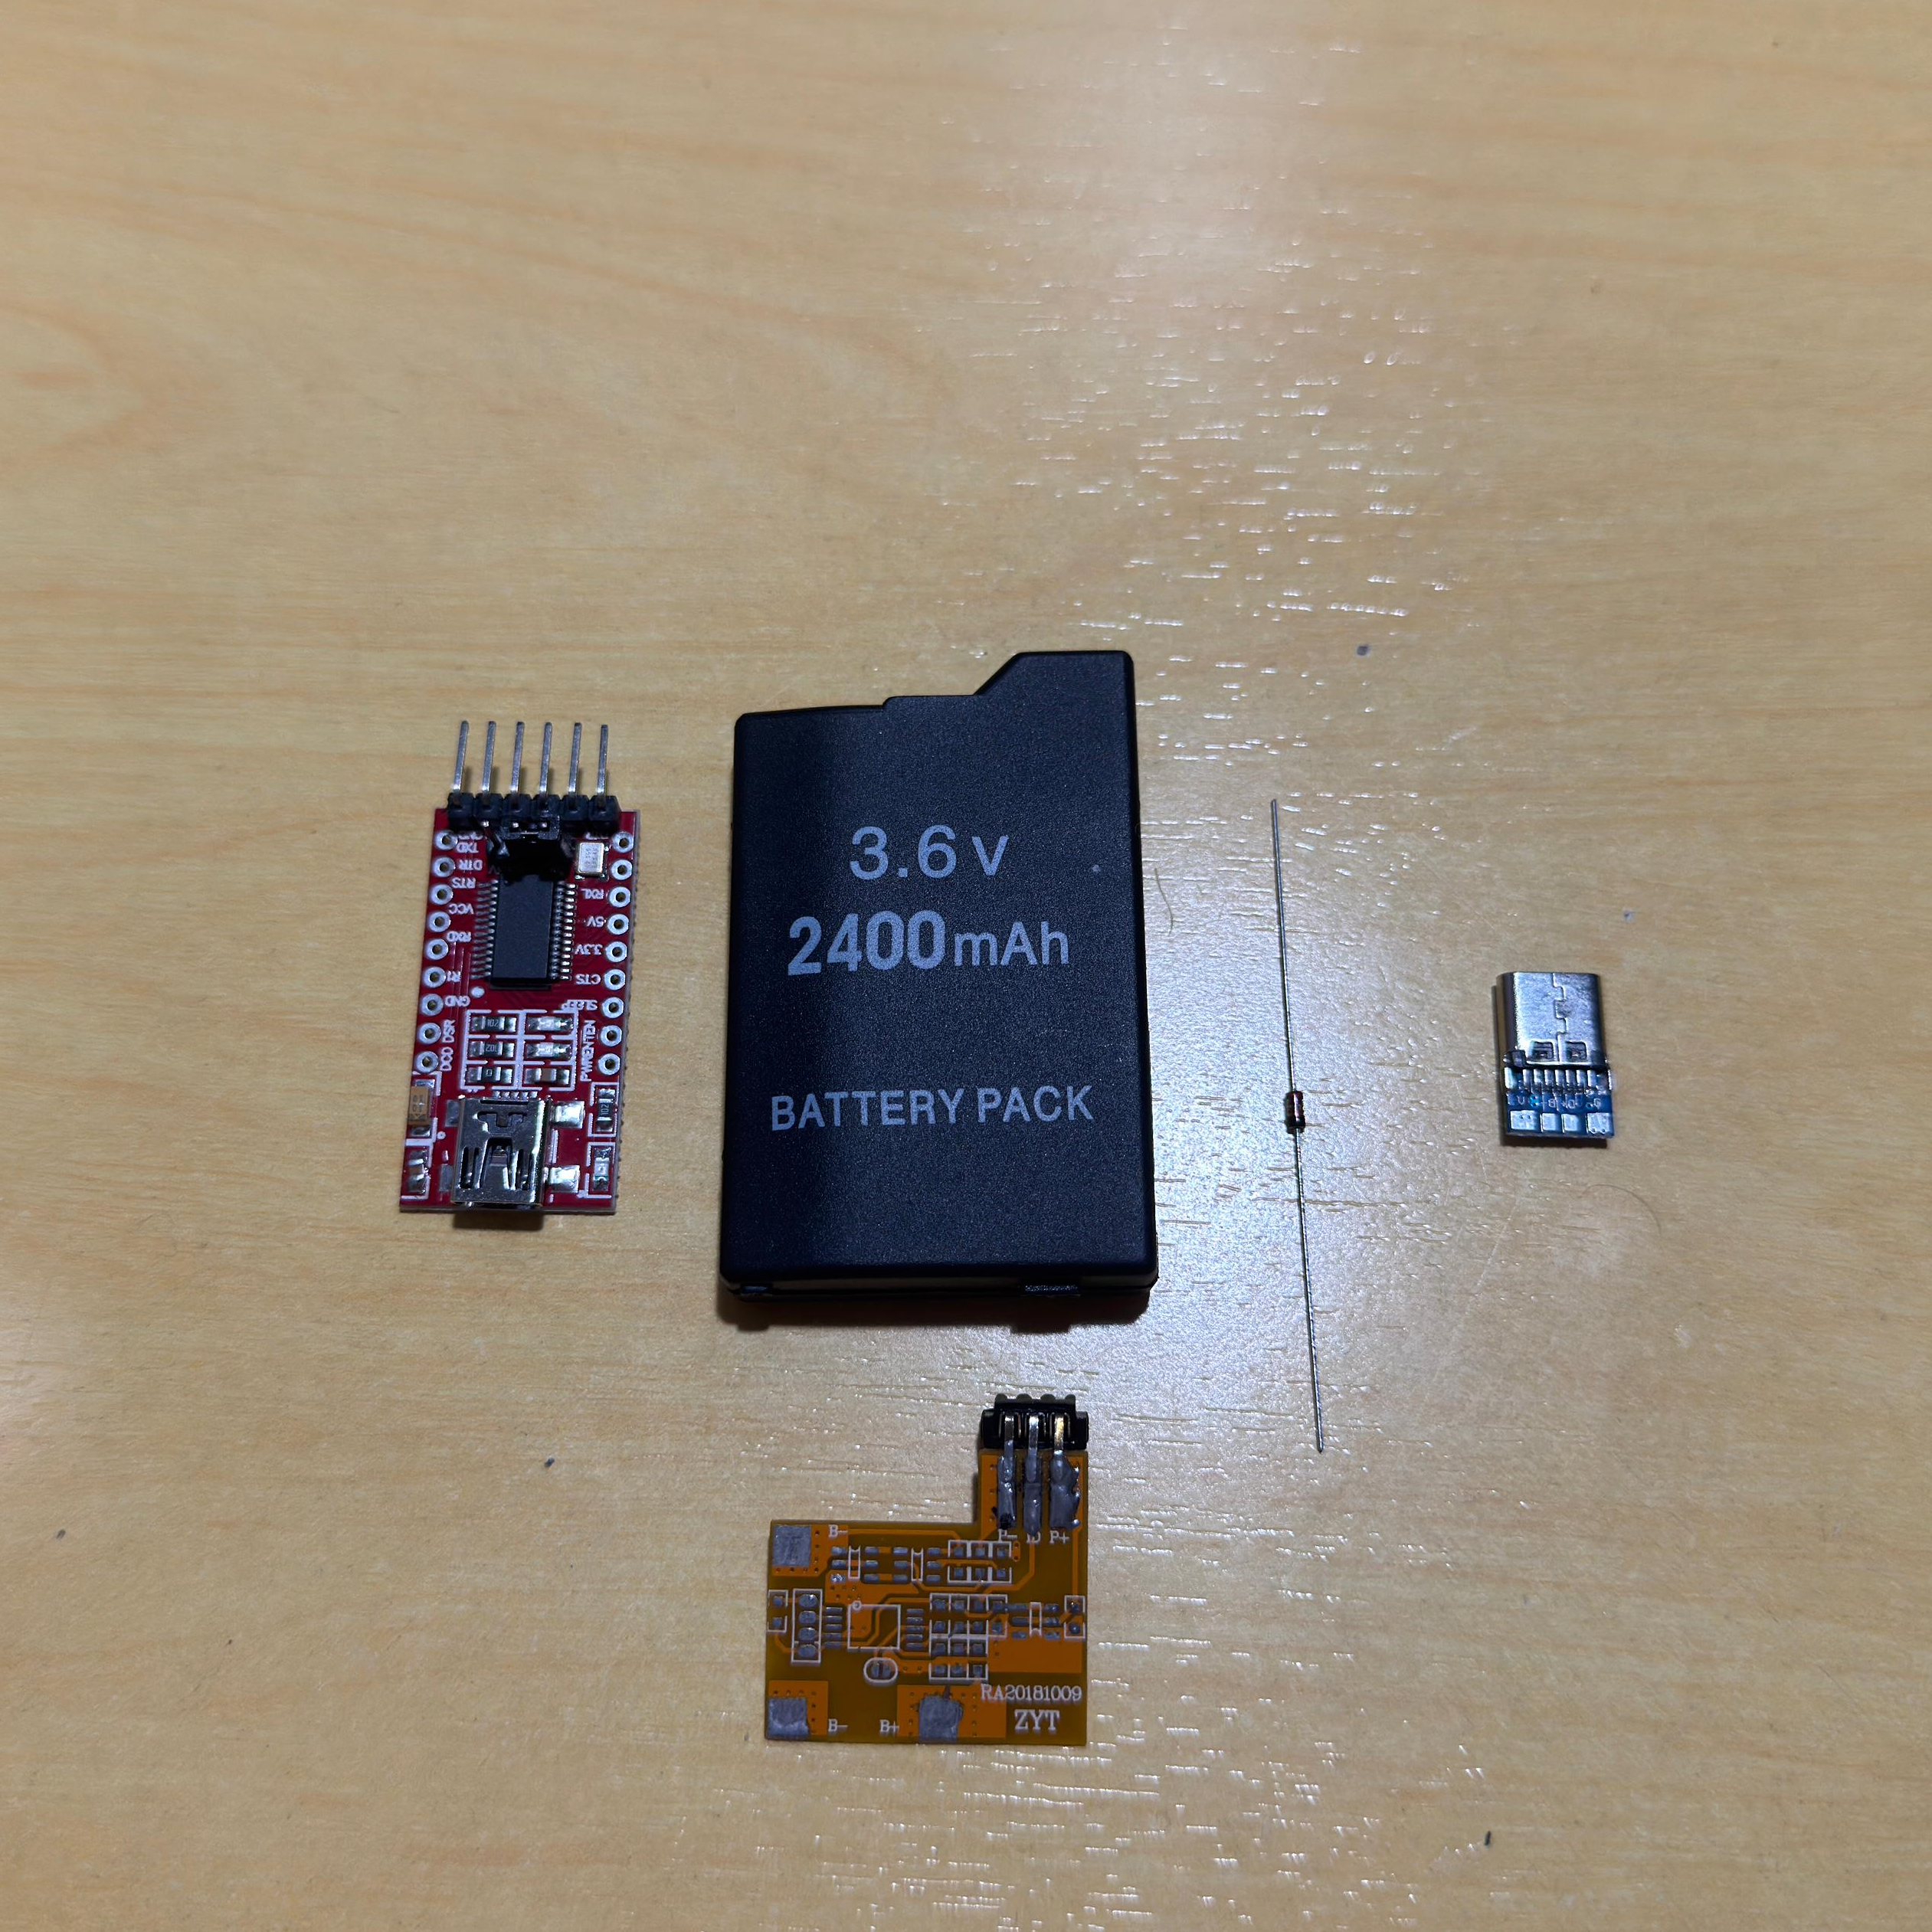
Required Materials
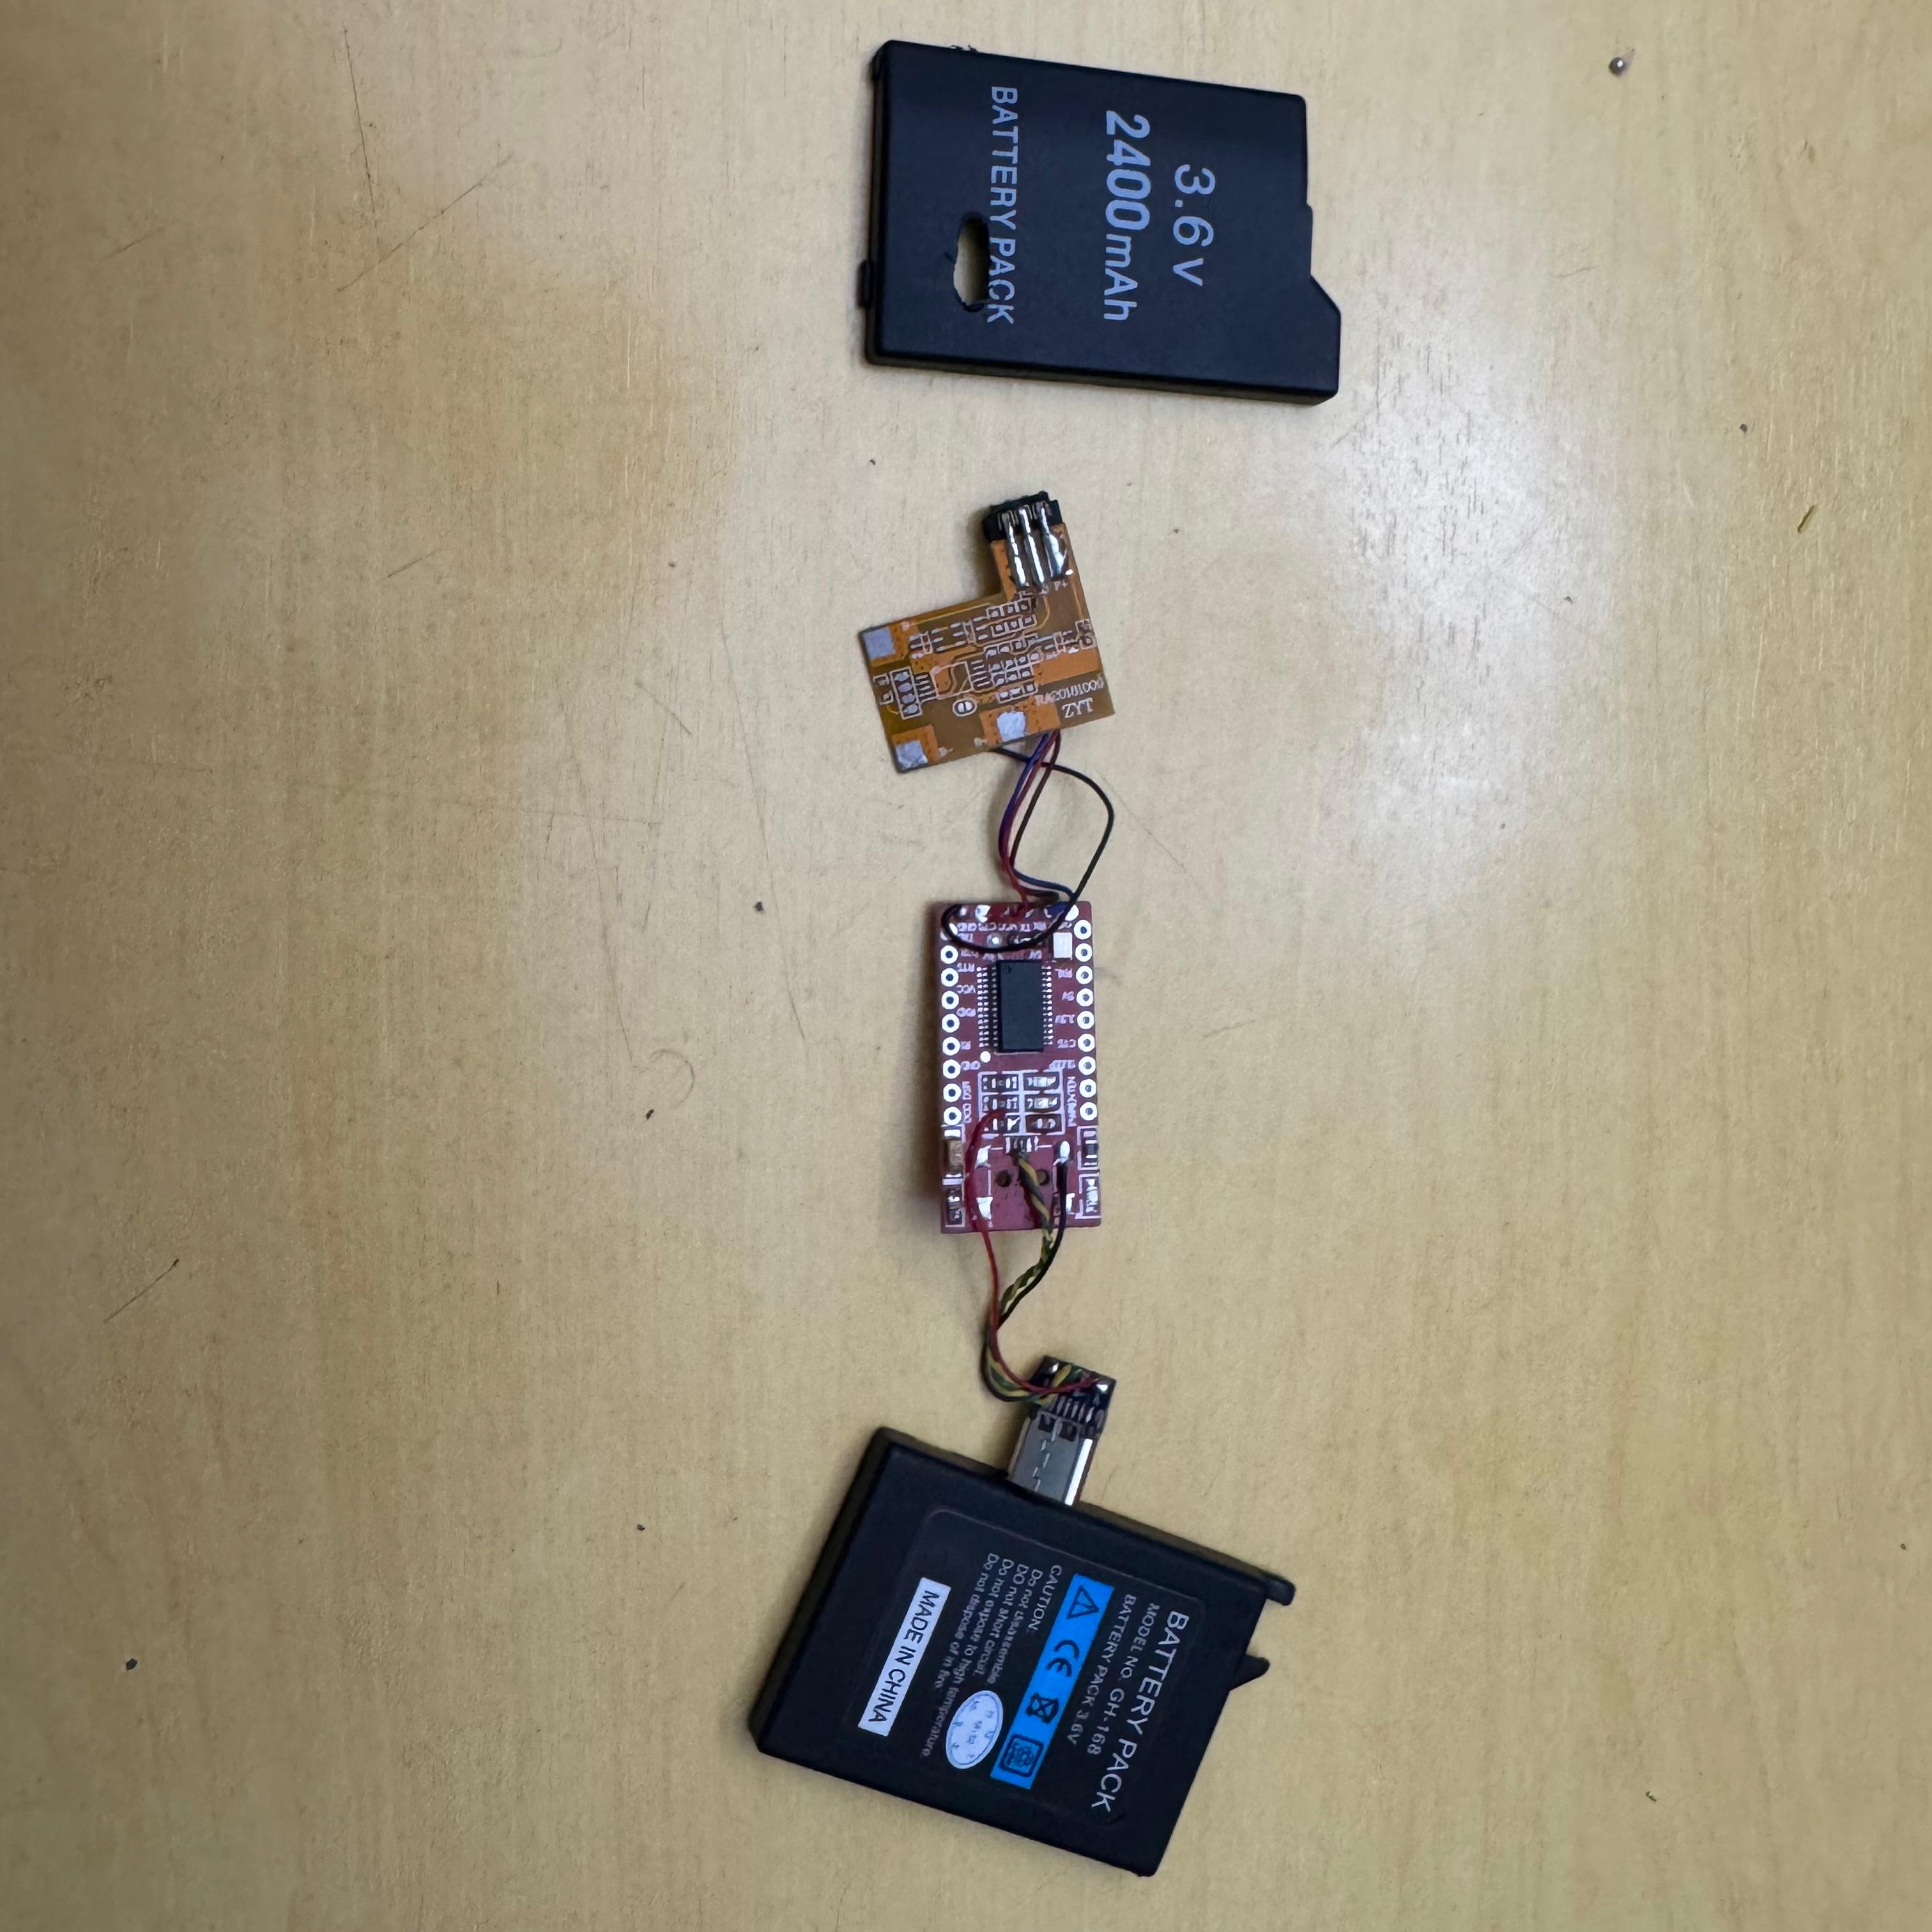
- FT232RL: USB-to-serial controller module.
- PSP Battery: Preferably unofficial.
- 1n4148 Diode: For signal connection.
- Wires: Various colors for identification.
- USB-C Port: Required for the connection.
- Tools: Soldering iron, solder, electrical tape, and cutting tools.
Initial Preparation
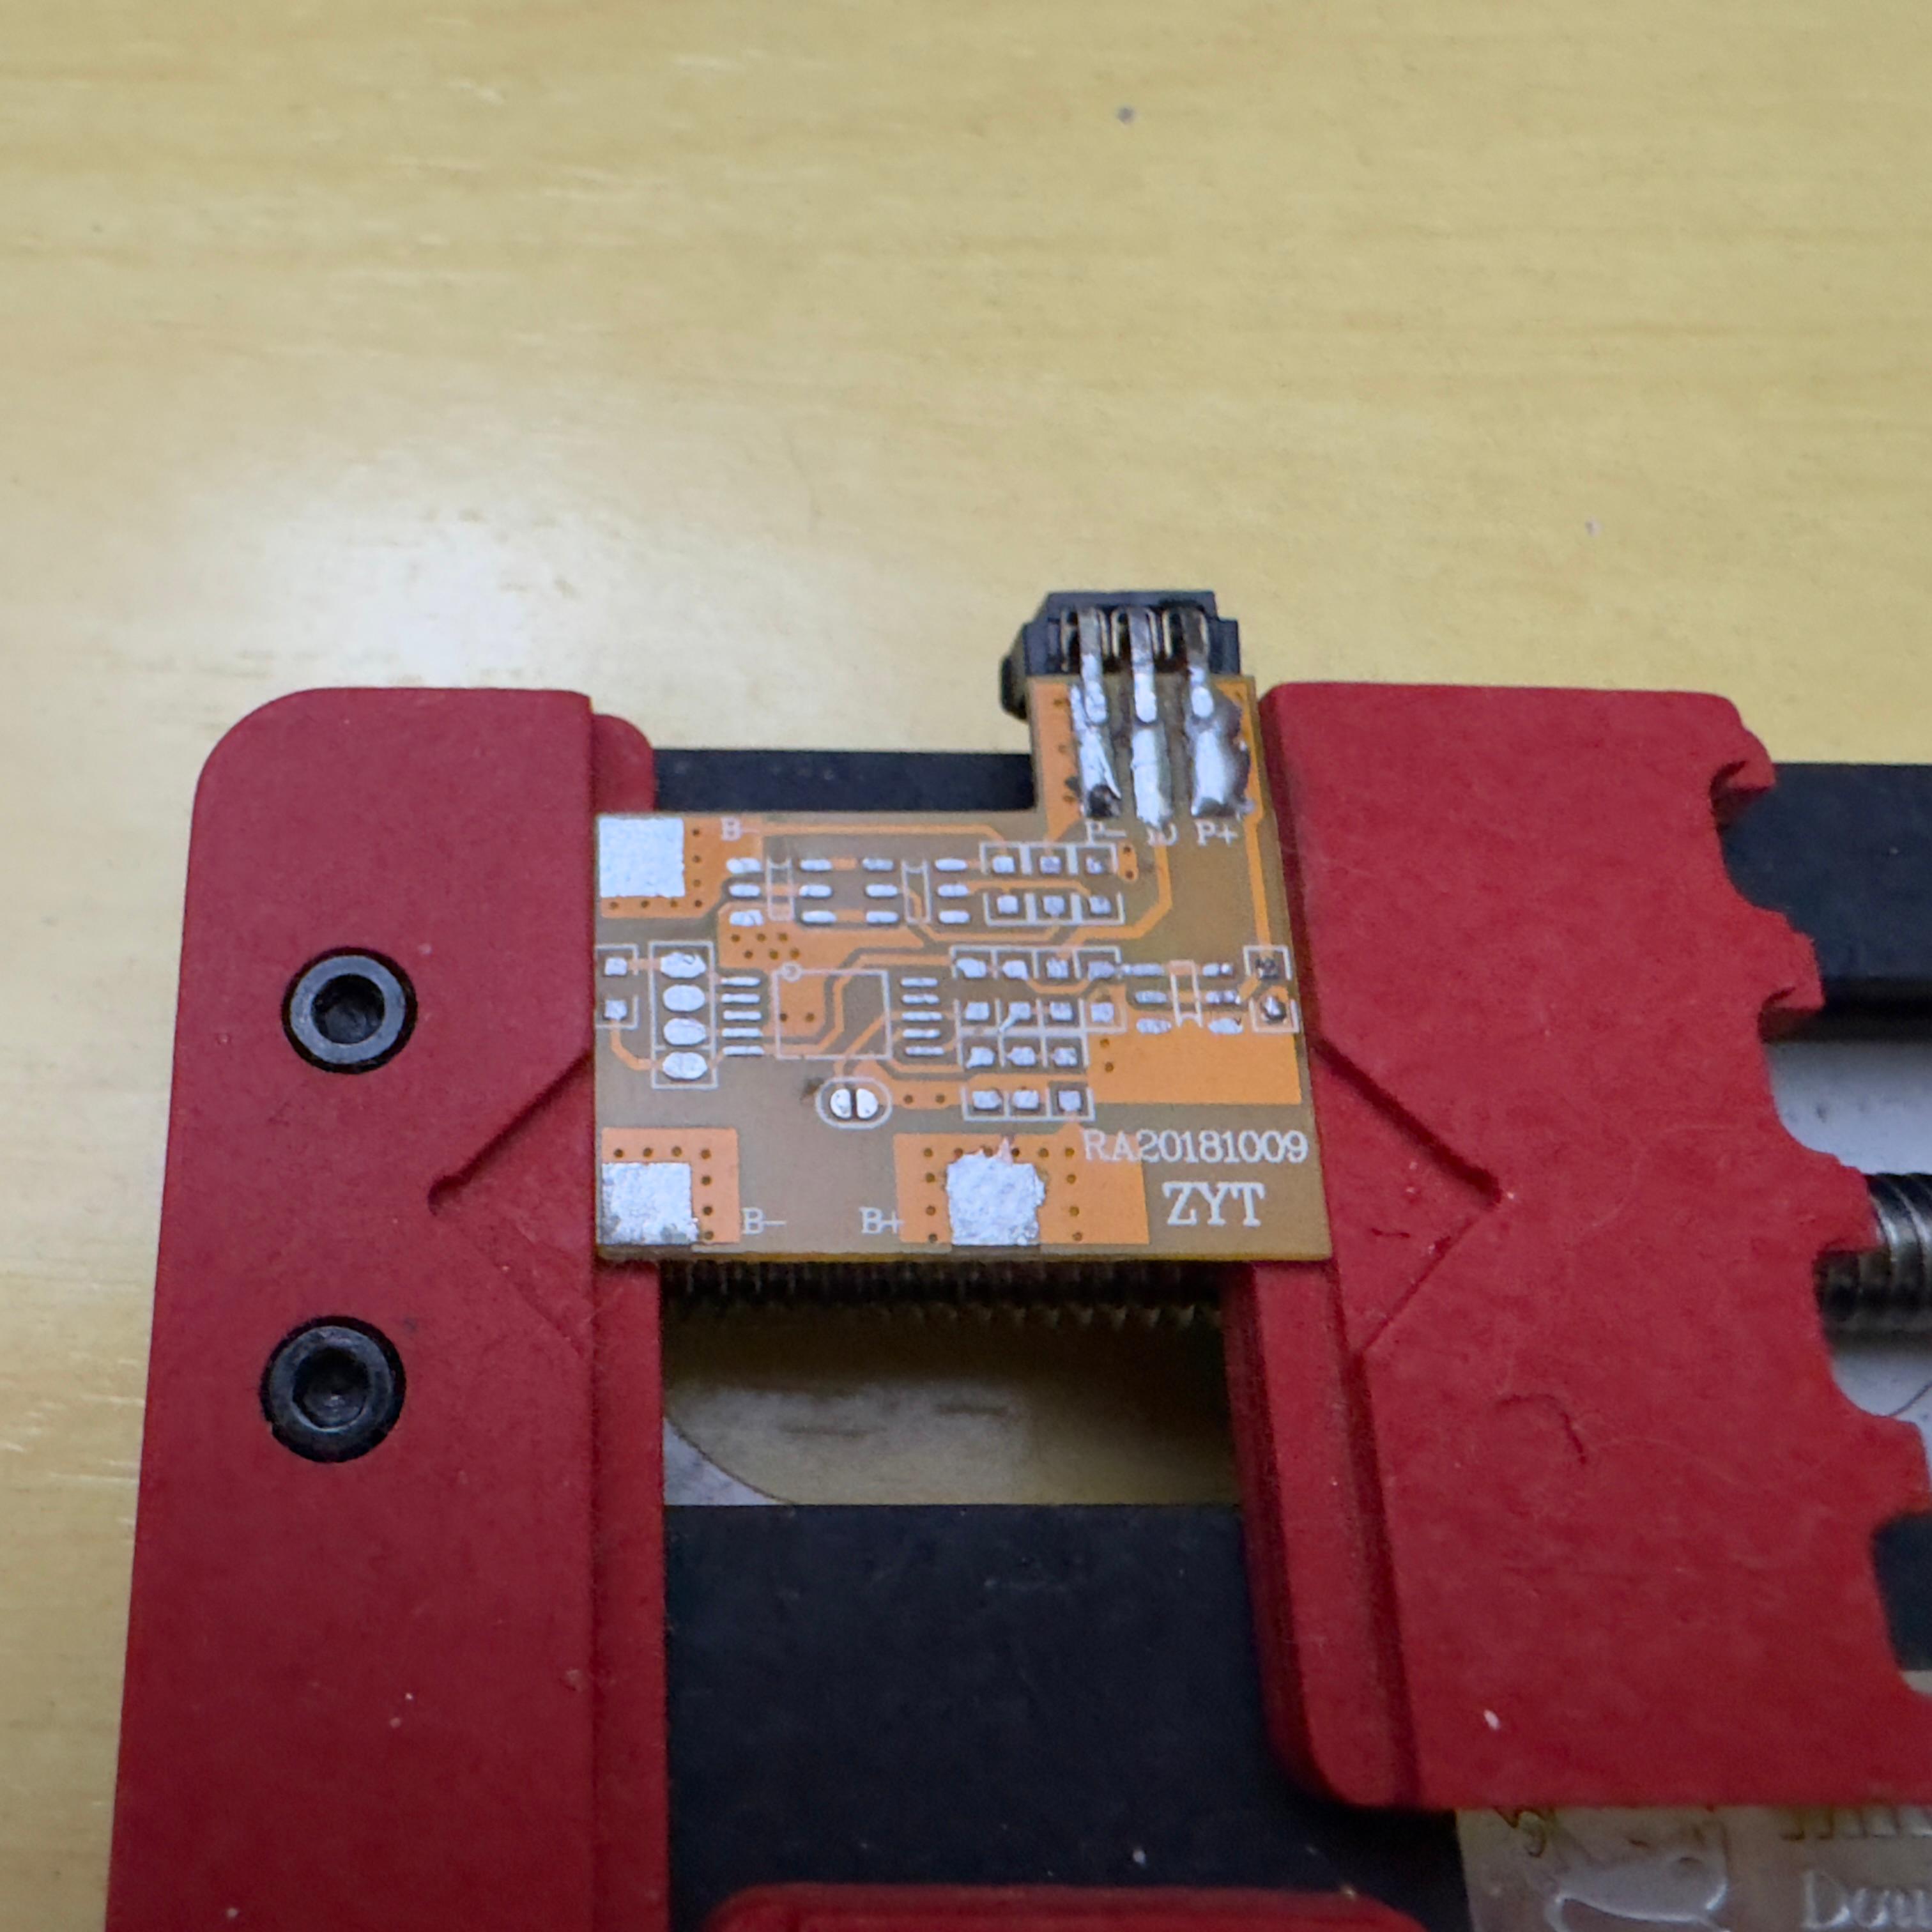
1. Prepare the Battery
Clean the battery board by removing all components except the connector. Scrape the voltage, ground, and signal traces to expose the connections.
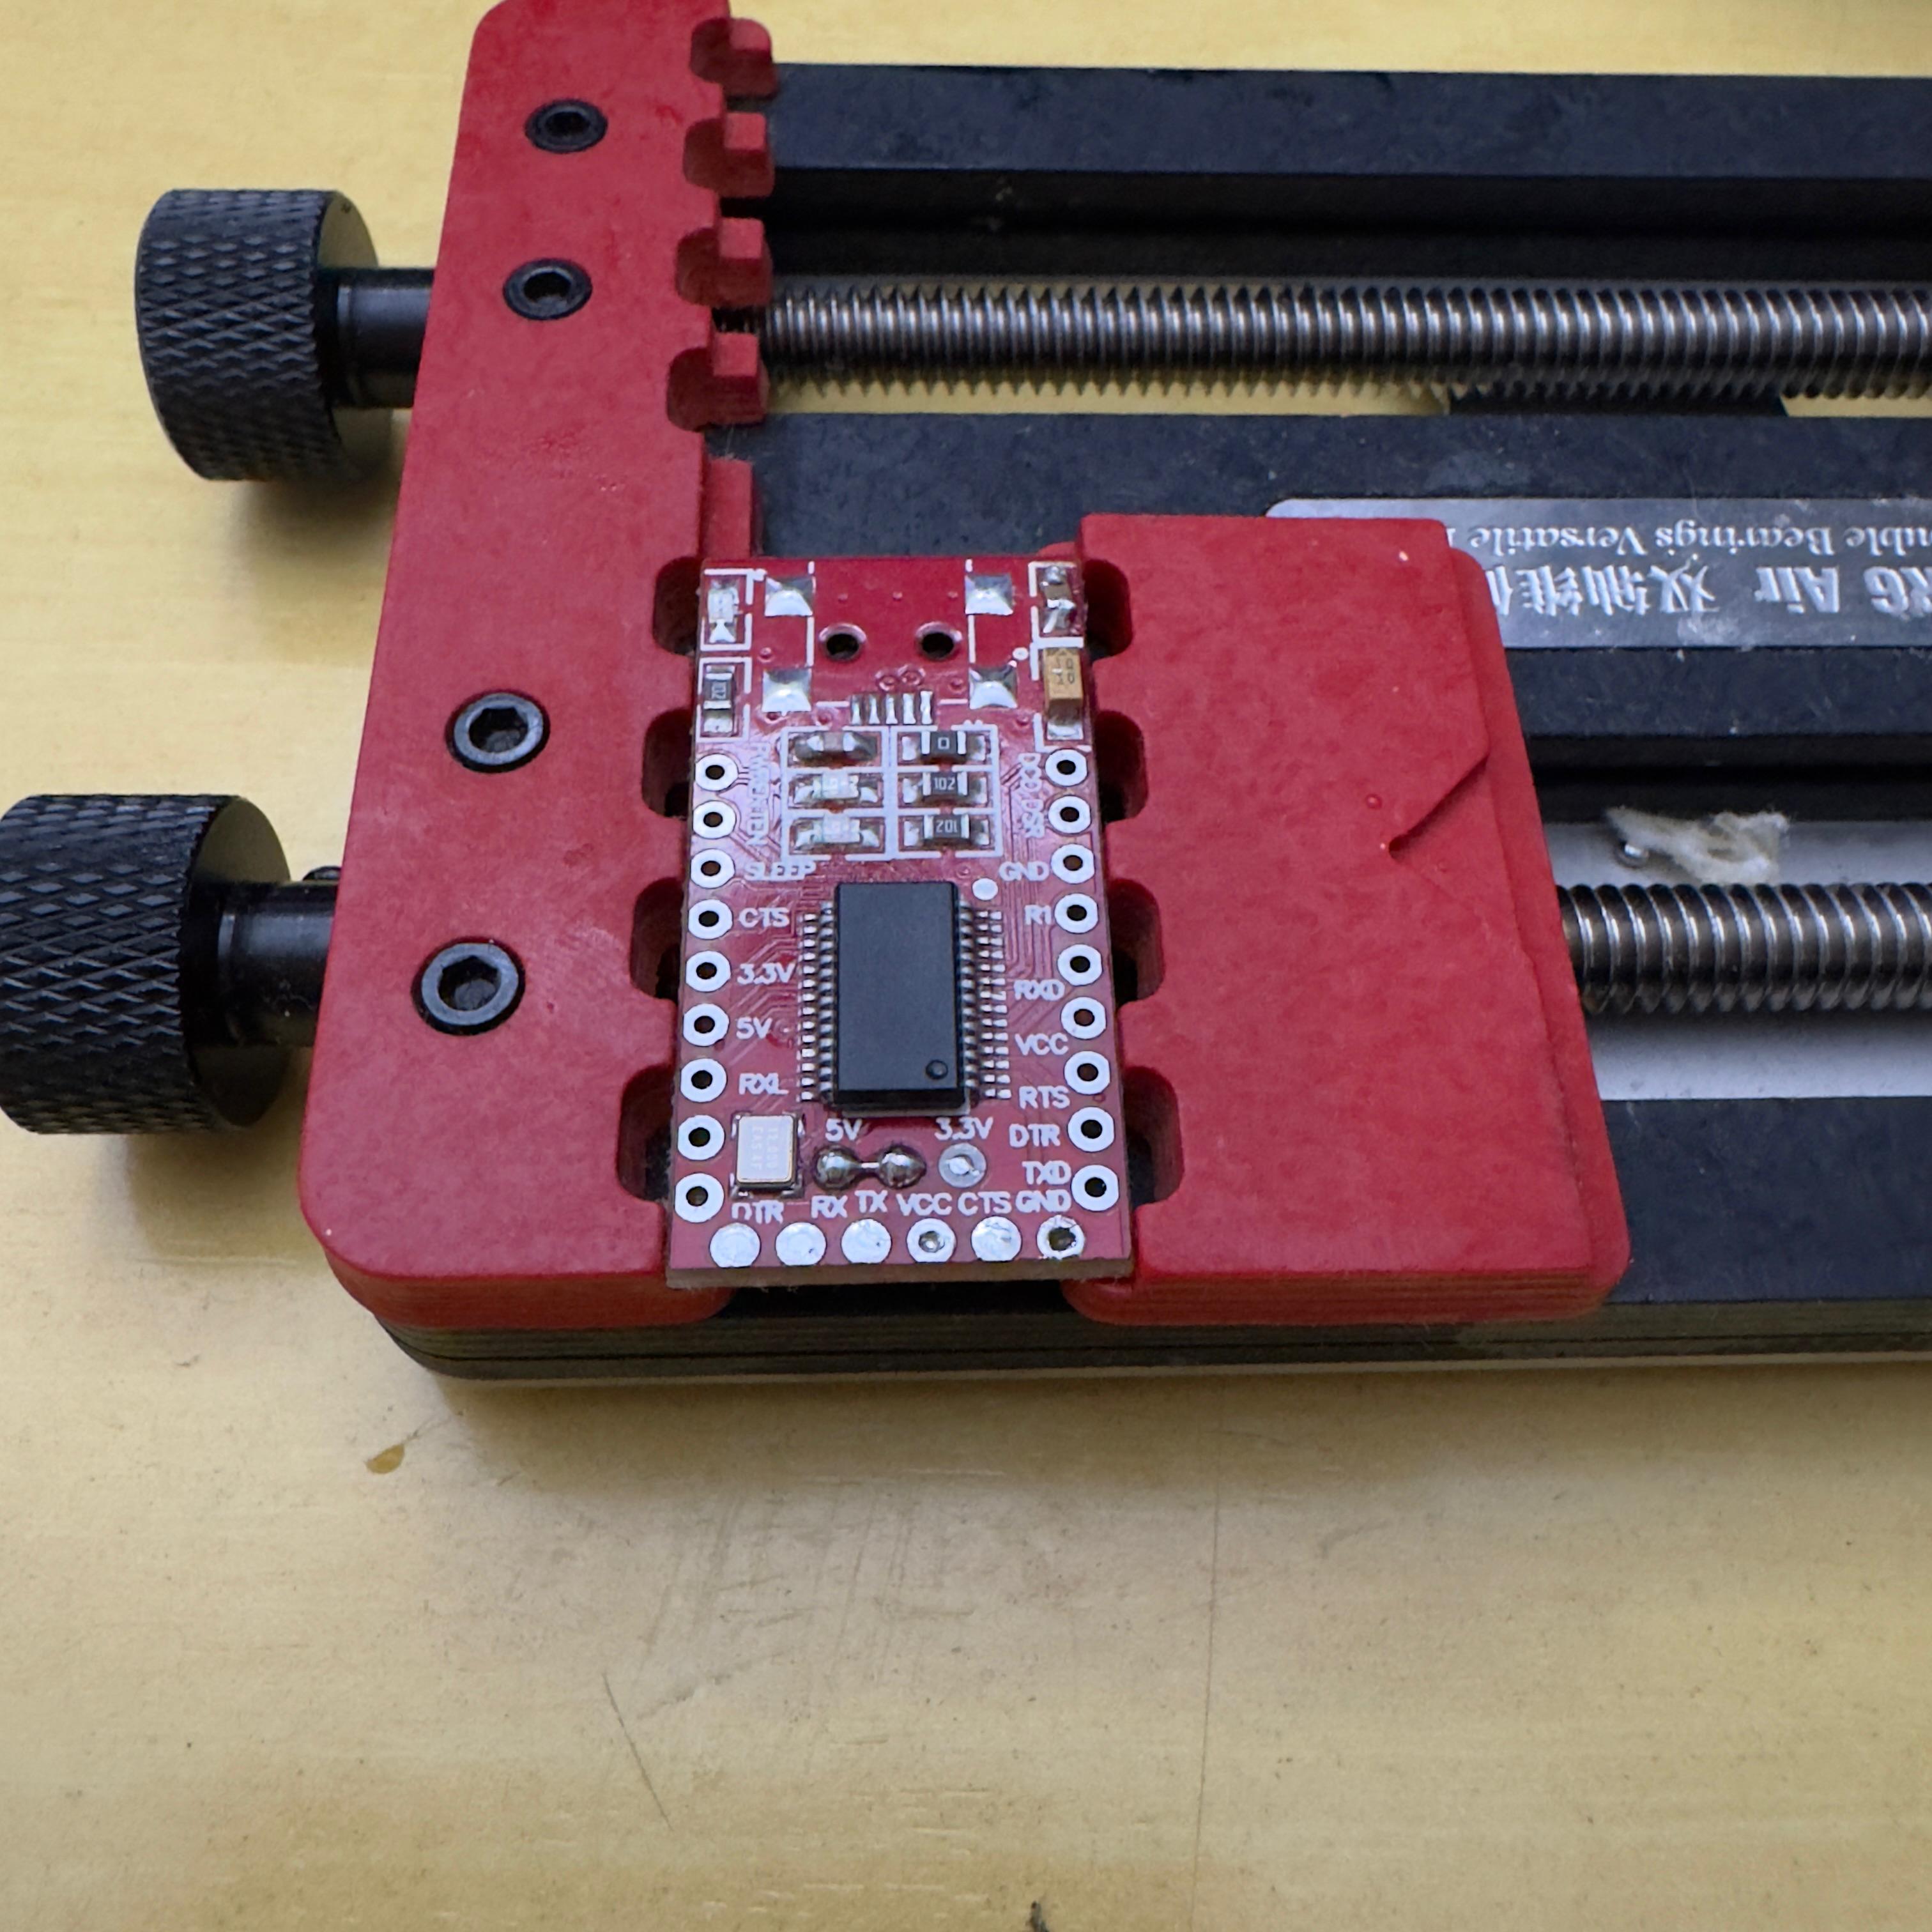
2. Modify the FT232RL
Remove the headers and ports from the module. Bridge the 5V headers to ensure a constant output.
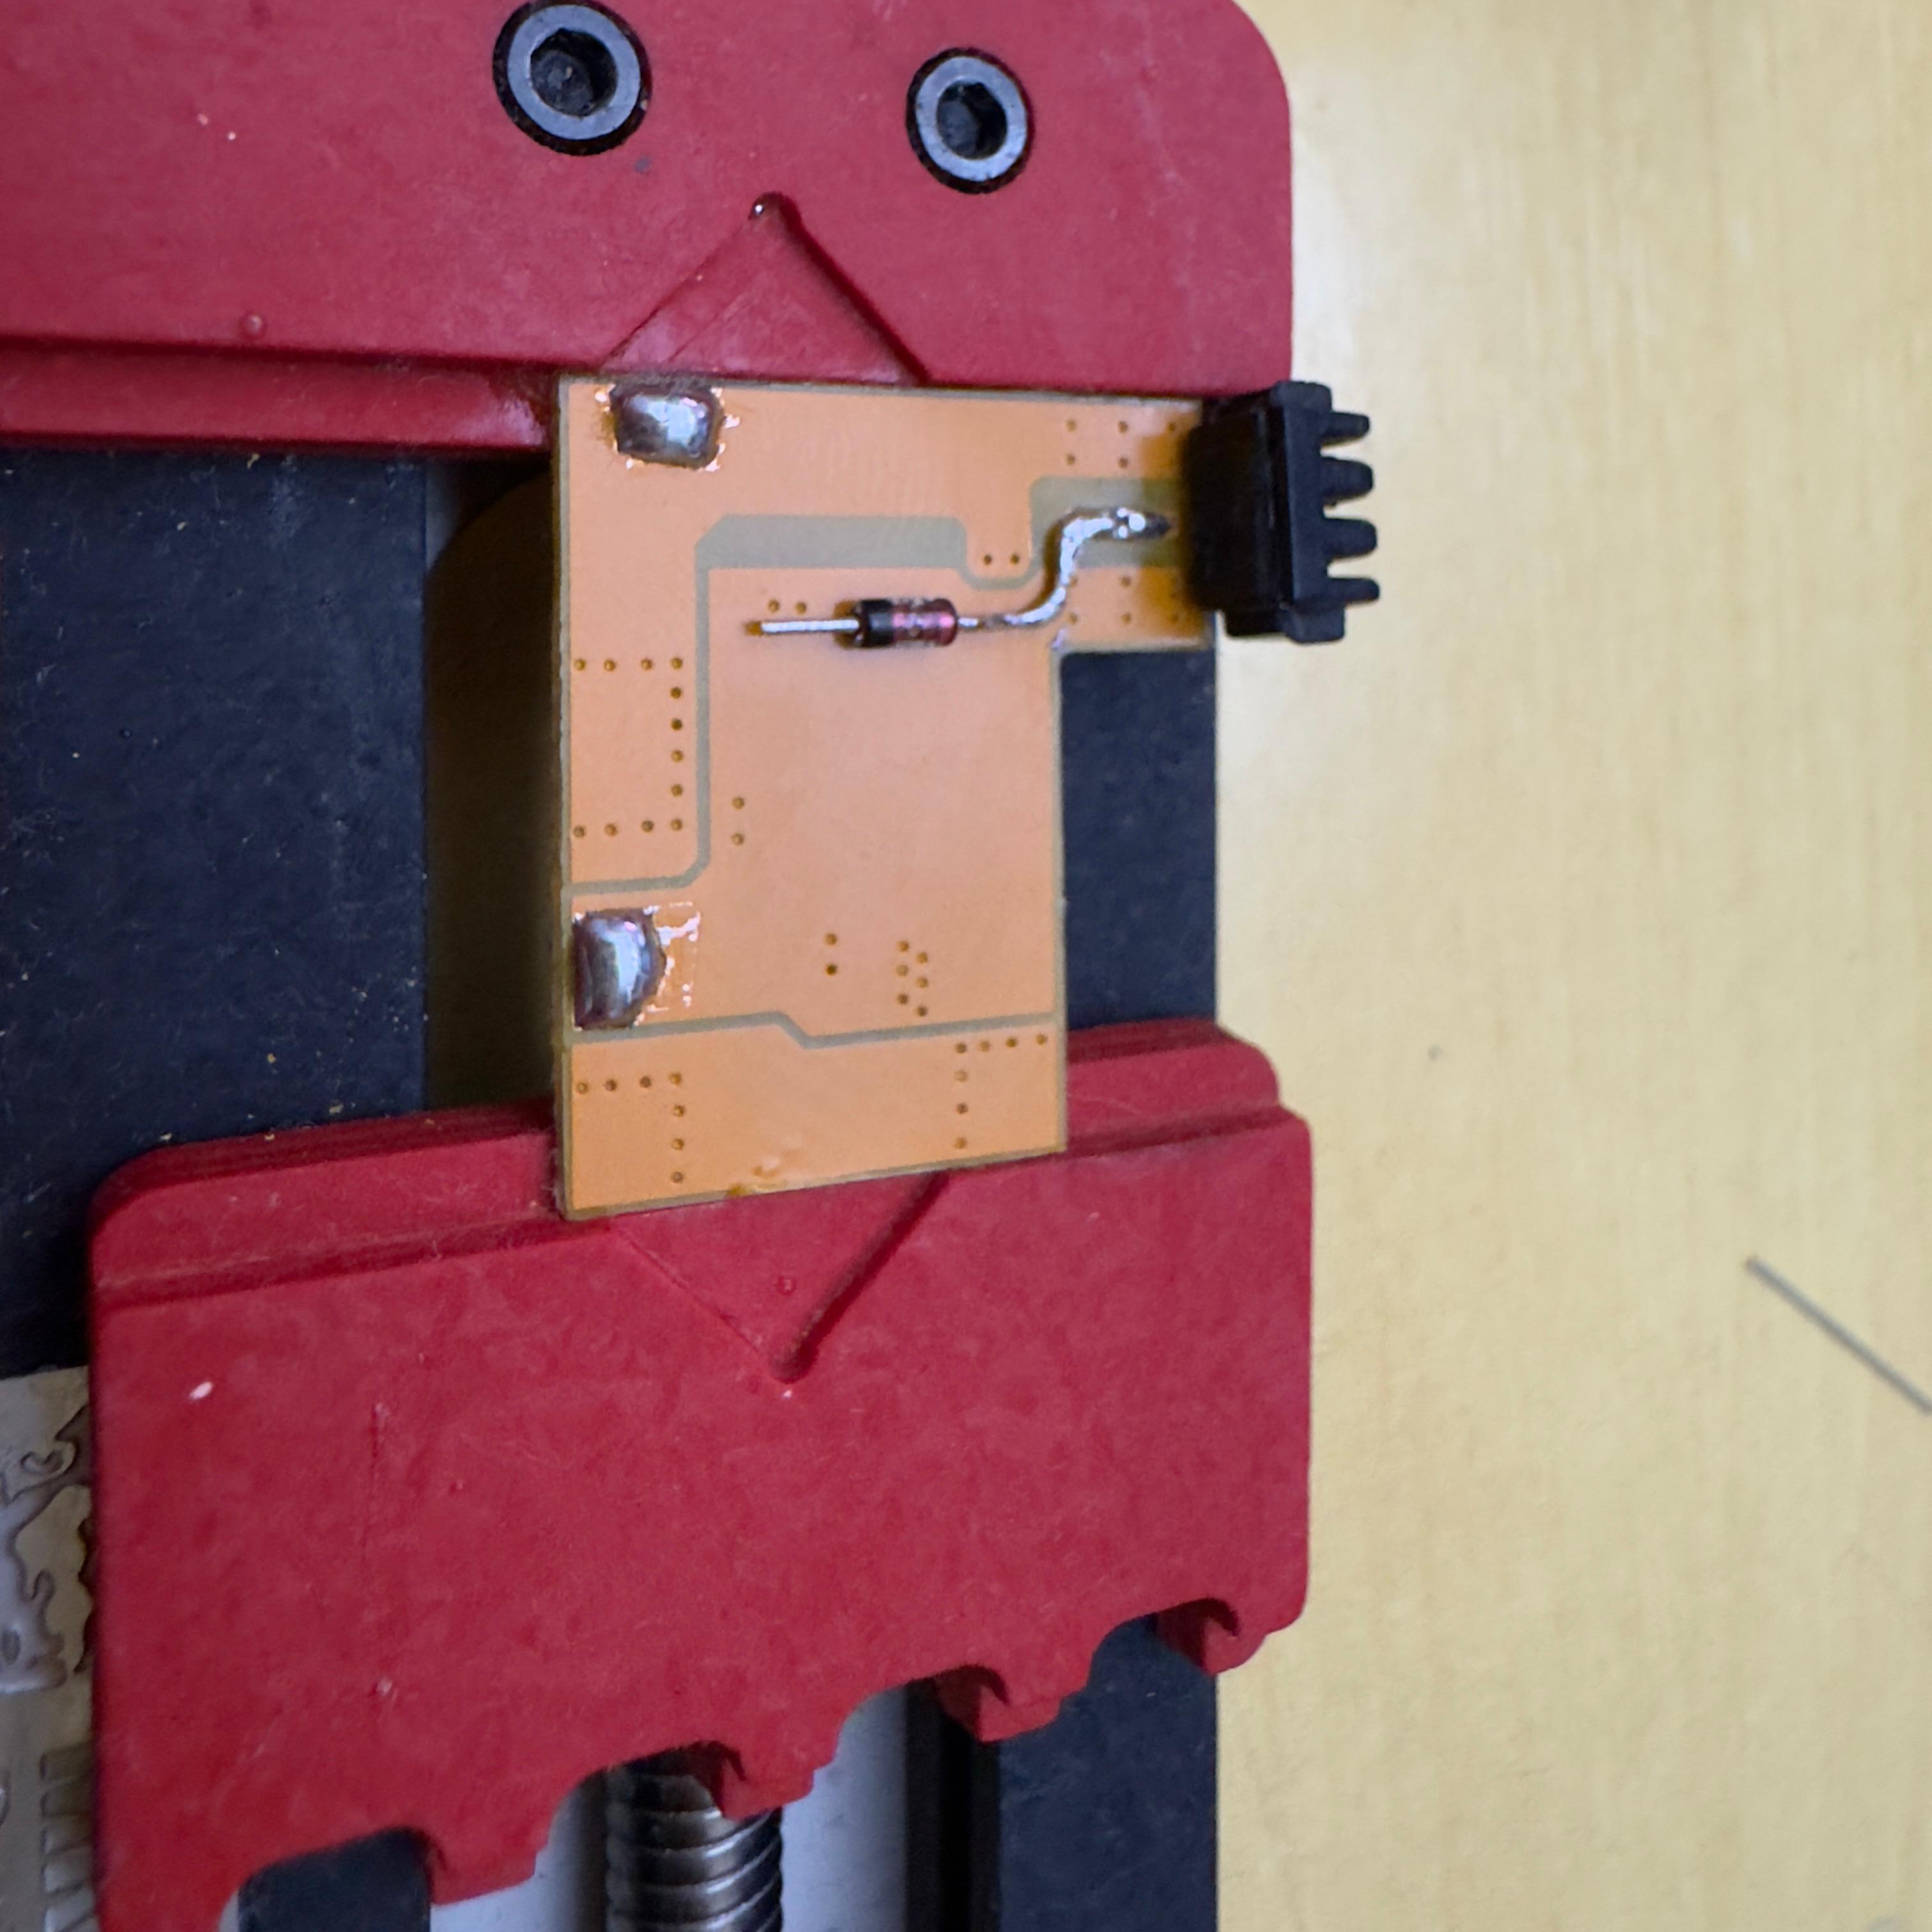
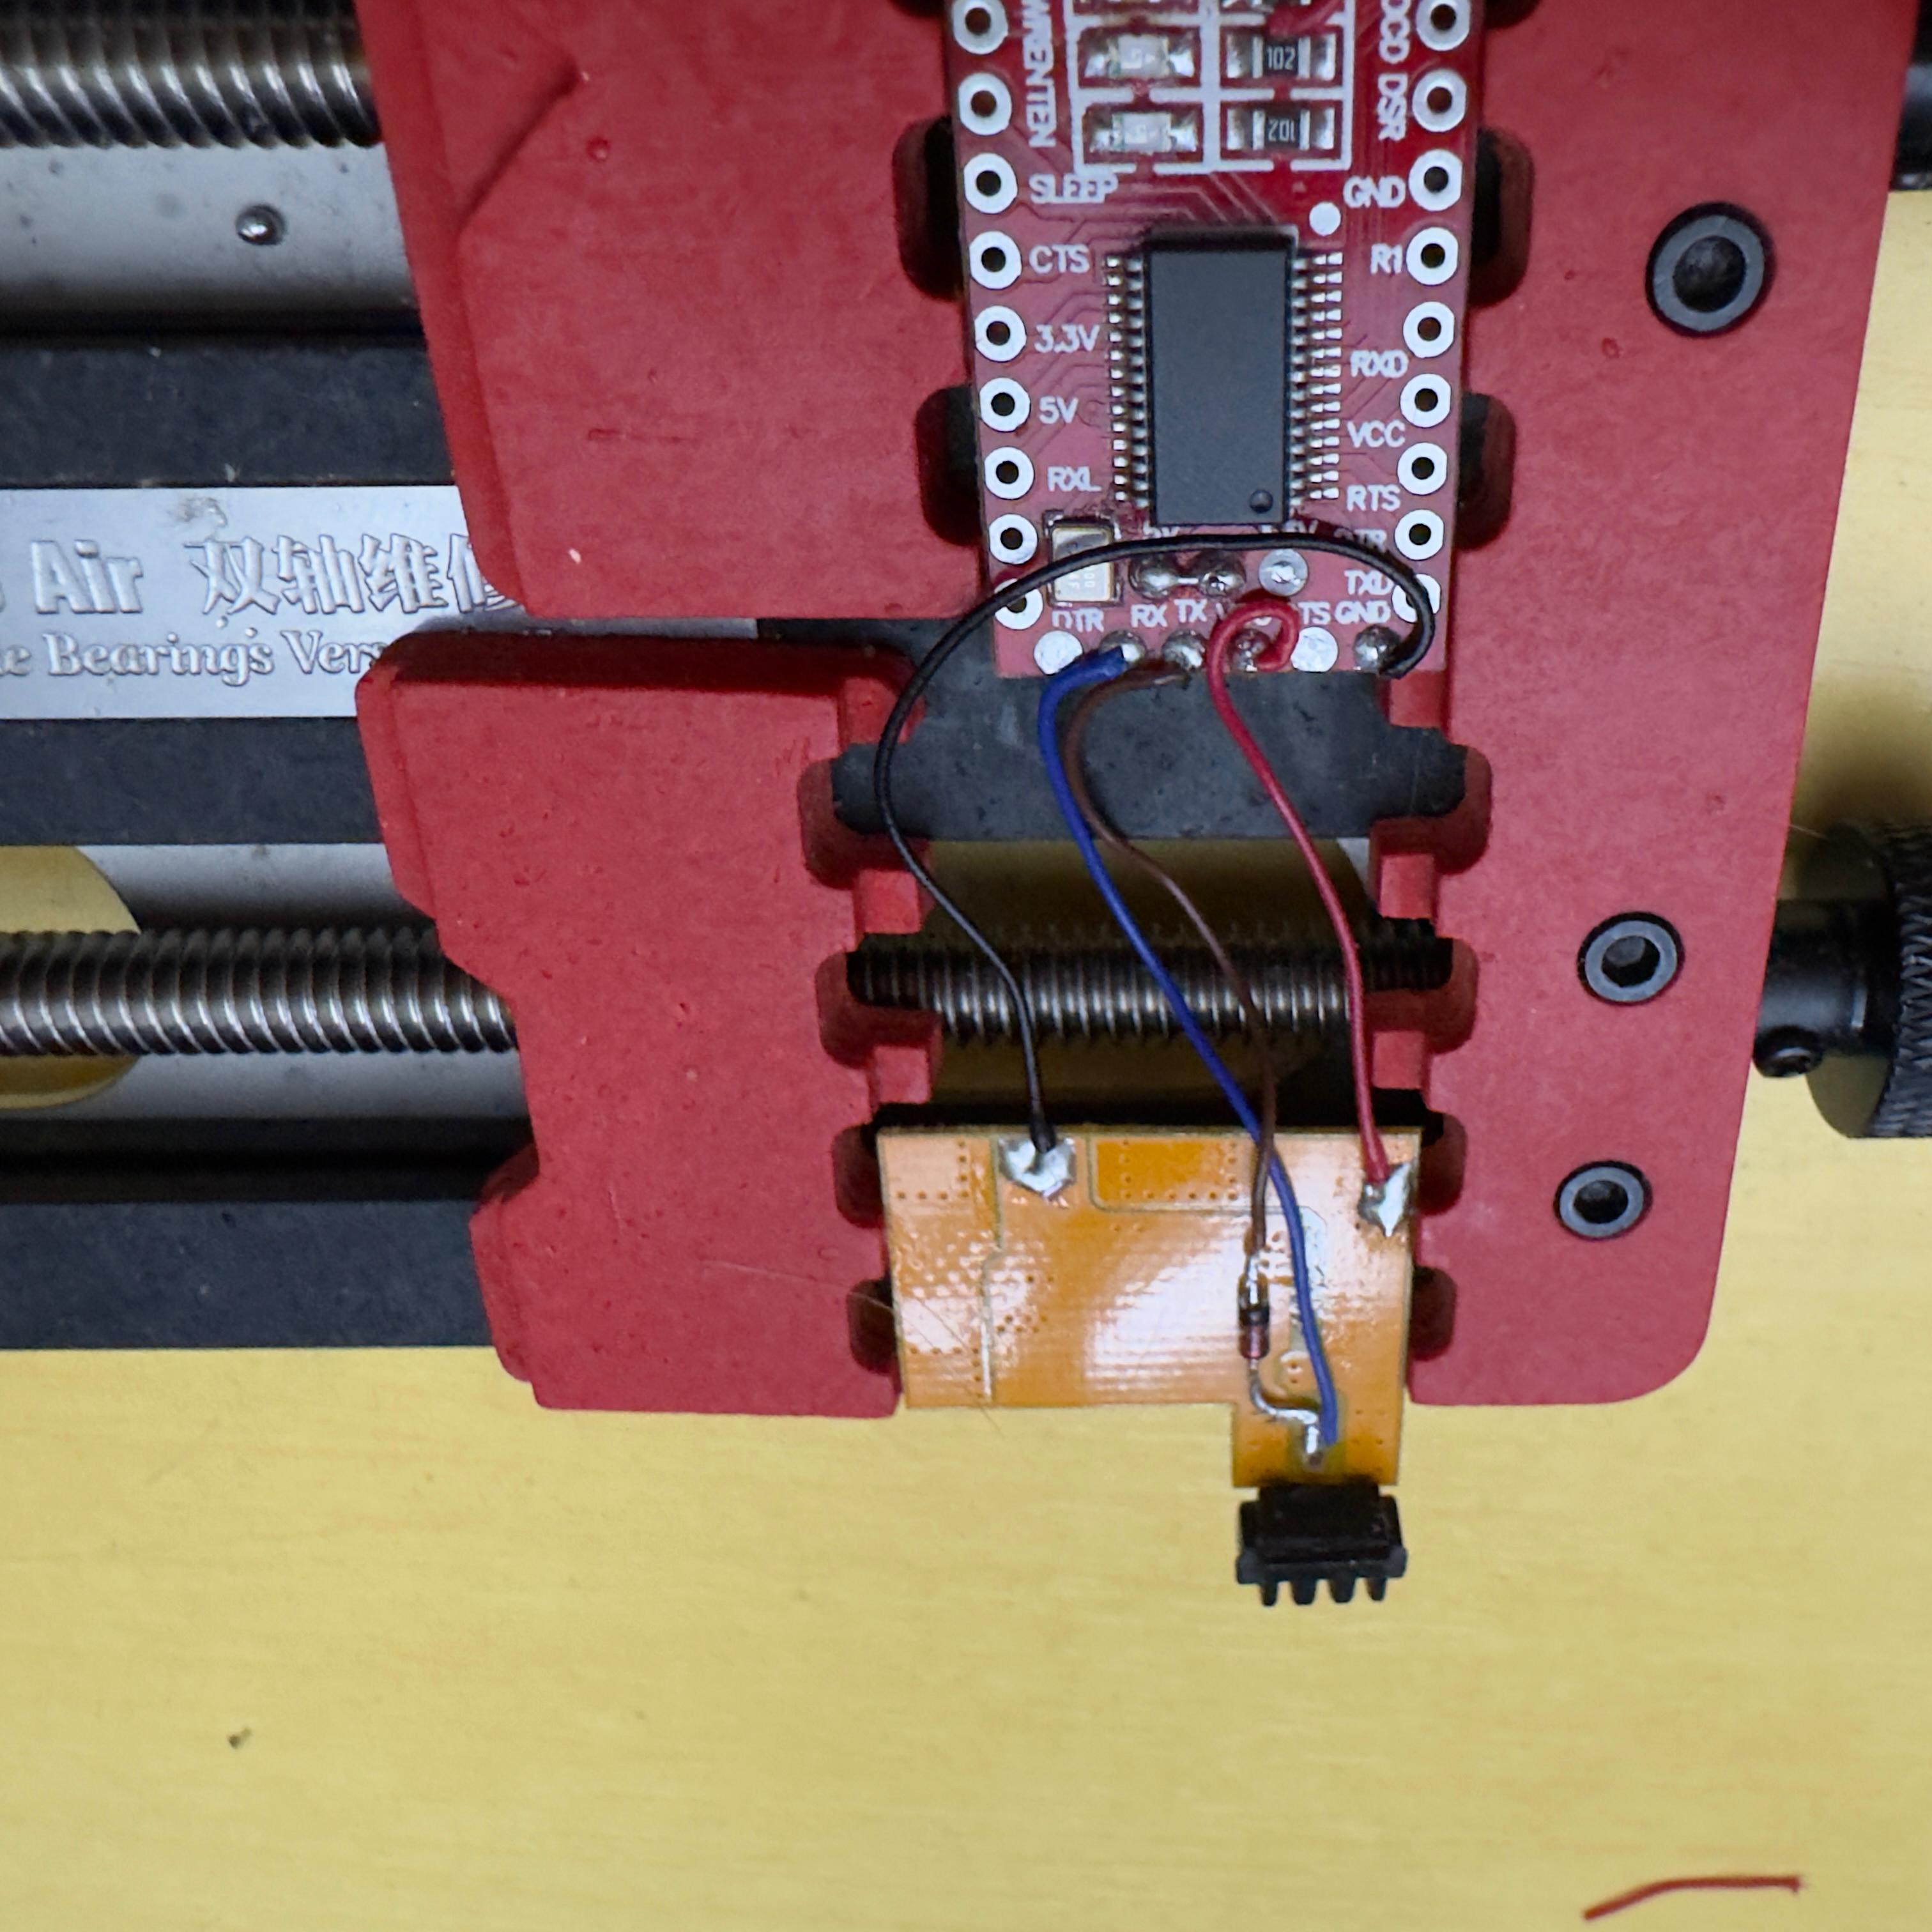
3. Connect the Diode
Bend one leg of the 1n4148 diode into an 'L' shape and solder a wire to connect it to the scraped trace on the battery board.
4. Voltage and Data Connections
Solder wires for VIN, GND, D+, and D- following the indicated schematic.
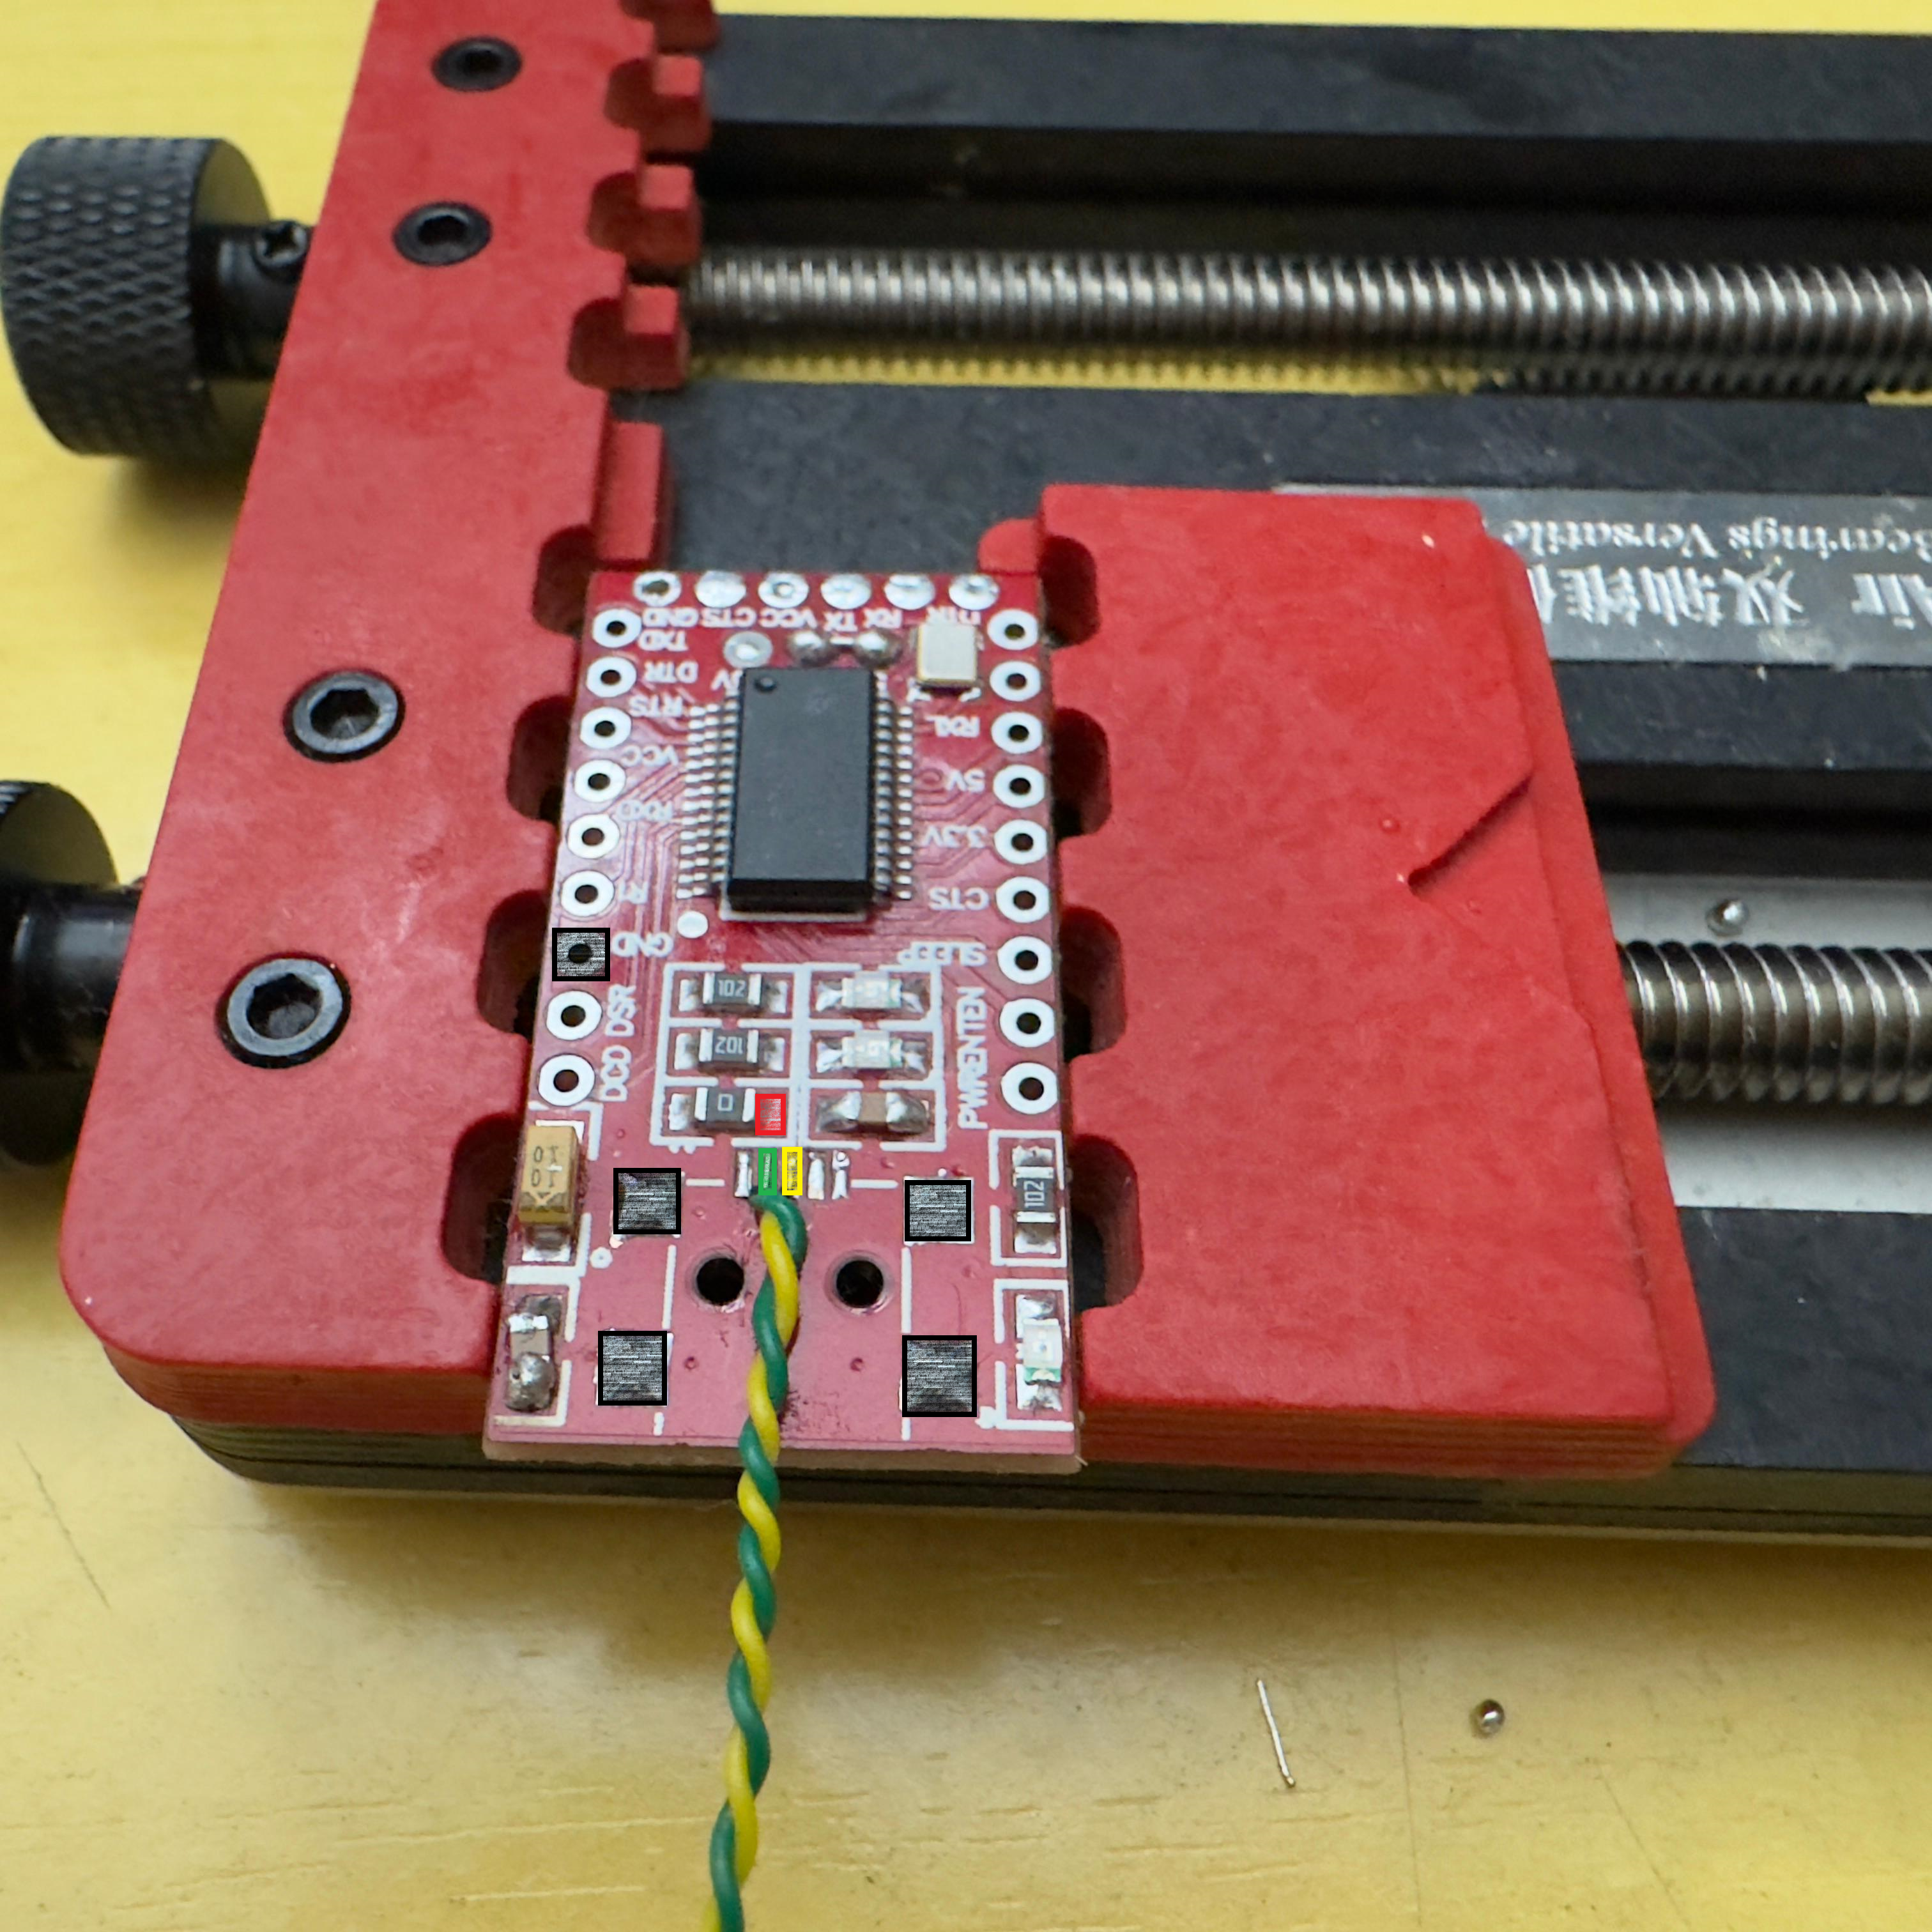
5. Connect RX, TX, 5V, and GND
Connect TX to the end of the diode, RX directly to the central pin, 5V to the left pin, and GND to the right pin.
6. Modify the Case
Adjust the case to fit the USB-C port. Use hot glue to temporarily secure the pieces.

7. Assembly
Place the boards inside the case, ensuring no short circuits occur.

8. Close the Case
Secure the case with adhesive tape.
